


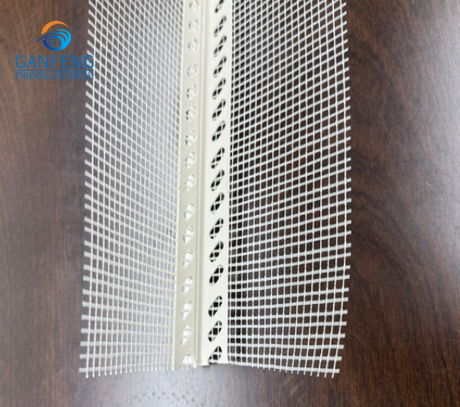
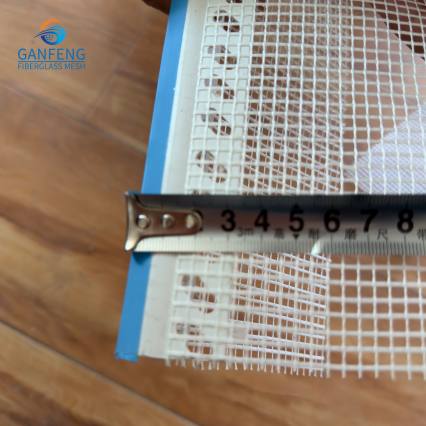
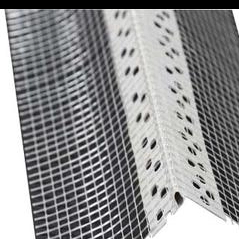


Two PVC profiles may both include fiberglass mesh wings and still solve different problems. A standard corner bead establishes and protects an angle in plaster or render. A drip bead adds a shaped release edge intended to make surface runoff detach at a specified horizontal or downward-facing termination. Substituting a plain angle at a drip detail can leave water tracking across an underside; placing a projecting drip profile at an ordinary vertical corner adds a feature that the detail may not need.
Functional comparison
| Question | Drip bead | Standard corner bead |
|---|---|---|
| Primary task | Release runoff at a designed edge while reinforcing it. | Define and reinforce a plaster corner. |
| Typical orientation | Selected external horizontal or downward-facing edge. | Vertical or other specified internal/external angle. |
| Critical geometry | Exposed drip nose and projection beyond runoff surface. | Angle, nose height, and finish cover. |
| Mesh role | Connect the profile to the surrounding reinforced coat. | Connect angle reinforcement to the surrounding coat. |
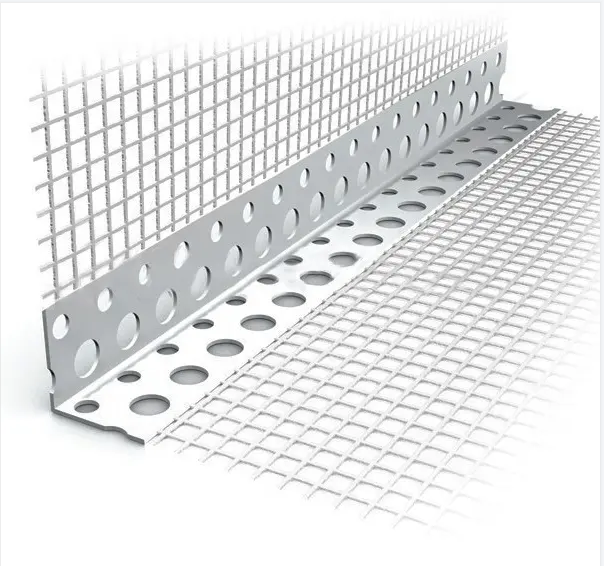
Choose by the path water takes
Trace water from the upper surface to its intended exit. If it can curl around an edge and run back across a soffit, a properly located drip break may be needed. If the edge is vertical and the main concern is a straight, damage-resistant finish, a standard angle may be appropriate. Neither profile corrects a reverse slope or replaces head flashing, sill drainage, waterproofing, or a movement joint.
Jiangxi Ganfeng Fiberglass Mesh Co., Ltd. groups the relevant products in its mesh drip bead category. Its water drip edge profile combines a described water-drip function with attached alkali-resistant mesh. Confirm the exact cross-section and position with a drawing.
What the shared mesh does not tell you
The presence of mesh wings is not enough to choose between these products. Both must be embedded in a compatible coat, remain flat, and overlap the field reinforcement according to the wall-system detail. The standard reinforced PVC angle bead is described with glass fiber fabric, but its title does not promise a drip nose. Conversely, the drip bead’s mesh does not guarantee that the water-release edge remains visible after rendering.
Request profile drawings with nose height, projection, wing widths, lengths, and tolerances. Mock up the edge in the specified base coat and finish. At a drip termination, inspect the final nose, continuity across joints, and interface with flashing. At a plain corner, inspect straightness, adequate finish cover, and mesh overlap.
Common substitution errors
- Calling every PVC angle a drip bead because it has a projecting nose.
- Assuming a mesh wing gives either profile a waterproofing function.
- Concealing the drip edge under finish or sealant.
- Using a drip profile where its projection interferes with an adjacent component.
- Replacing a system-approved profile based only on similar appearance.
Do not let a similar silhouette hide a different function
Both products may look like PVC angles when viewed from the front. The decisive feature is the cross-section at the exposed edge. A drip profile needs a clear release point positioned to interrupt the path of runoff. A standard angle typically establishes a straight corner and a guide for coating thickness. Some standard beads have a nose that projects slightly, but projection alone does not prove a reliable drip function in the specified wall detail.
Request section drawings at the same scale and mark the finished render plane, outer water path, substrate, and mesh plane. This exercise exposes whether the nose will actually project beyond the surface from which water should detach. It also shows whether the selected profile fits the proposed coat thickness. If either drawing lacks dimensions, ask the supplier for a revised technical sheet before treating the items as alternatives.
Four site scenarios
Vertical outside corner
The primary concern is a straight line, edge protection, and continuous reinforcement across the corner. A standard bead with suitable mesh wings is a common candidate when the wall system permits it. Adding a drip nose to a vertical corner may create an unnecessary ridge or conflict with adjacent trim. Specify angle, nose height, wing overlap, and finish cover rather than assuming every mesh-attached profile is equivalent.
Exposed soffit termination
Here water can travel over the outer face and curl beneath the projection. A drip profile may establish a release point if the upper slope and overall drainage detail are sound. The nose must remain clear after finishing, and the run must remain continuous through joints and returns. A plain corner bead can define the edge neatly yet leave the water route unchanged. The designer should confirm the profile's location relative to the outermost runoff plane.
Window head
A head detail often combines render, flashing, frame interfaces, sealant, and sometimes a drainage cavity. The drip bead addresses runoff at the exposed render edge; flashing has a different role. A standard corner bead may still be needed at another part of the reveal. Do not replace the complete head detail with either single profile. Examine end returns and clearances so water is not redirected into a window joint.
Interior wall or protected reveal
A protected interior corner ordinarily has no rainwater release task. A standard bead selected for the substrate and finishing material is usually the relevant comparison. A drip profile could complicate finishing or produce an unwanted shadow line. If the detail calls for a decorative reveal or shadow gap, use the specified architectural profile instead of treating a drip bead as a generic trim strip.
Compare systems, not just accessories
The same mesh wing description can conceal different widths, apertures, coatings, and attachment methods. In a cementitious base coat, both profiles require appropriate mesh durability and overlap with field reinforcement. In drywall compound, a product intended for exterior render may not provide the desired finish geometry. Confirm the exact item with the system holder, especially when changing a bead from the assessed assembly.
A drip profile is not an isolated waterproofing product. It cannot correct reverse slope, failed flashing, blocked drainage, or a sealant joint that channels water inward. Similarly, a standard angle does not by itself supply impact resistance to a whole wall. Each profile performs a limited role within the substrate, base coat, mesh, finish, and adjacent water-management details.
Procurement decision worksheet
| Field condition | Question to answer | Likely direction |
|---|---|---|
| Runoff crosses a downward edge. | Where should water detach, and is the nose exposed? | Assess a system-approved drip profile. |
| Vertical exposed plaster corner. | What angle, cover, and reinforcement are required? | Assess a standard corner bead. |
| Opening with flashing. | How do profile, flashing, frame, and sealant connect? | Follow the complete head or sill detail. |
| Movement joint at an edge. | How is movement accommodated? | Use the designed joint profile, not a rigid continuous bead. |
For the selected profile, record the product code, drawing revision, PVC grade for exposure, nose projection, wing widths, coating, length, and acceptable tolerances. Ask for a production sample and compare it with the system-approved detail. Keep the drip and standard corner items on separate purchase lines; similar names and packaging can cause a field mix-up.
Test and inspect the finished detail
Build a mock-up using the actual substrate, base coat, mesh overlap, and finish. For a drip detail, inspect the final exposed nose, slope, transitions, and ends. For a standard corner, inspect alignment, cover, and reinforcement continuity. Mark the sample as approved only after the designer resolves any difference from the drawings. Record the approved cross-section in site instructions so the crew does not substitute a visually similar strip.
At receipt, inspect cartons for correct labels and lengths. Check straightness and undamaged mesh attachment. During installation, verify the reinforcement before it is hidden by finish. After completion, check that later paint or sealant work has not filled the drip groove. If staining or cracking develops, investigate the water route and wall assembly instead of assuming the visible bead is the sole cause.
Cost and maintenance implications
A drip bead may cost differently from a standard angle because of its section and intended use, but unit price is a poor selector. Include the labor needed for correct positioning, special ends, field-mesh overlap, and inspection. A misplaced inexpensive drip bead offers no useful runoff break; a standard bead installed at a water-critical edge may require costly rework. Specify the needed function first and price the complete detail.
Maintenance differs as well. Both profiles should remain secure and the finished surface should be checked for cracks, but a drip bead also needs a clear release edge. A future coating or sealant application can unintentionally bridge the groove and allow water to track back. Provide a simple as-built section to maintenance teams so they recognize which edges must remain open and which are ordinary protected corners.
Write separate acceptance criteria
A shared carton label such as “PVC bead with mesh” is not enough for a mixed project. The drip profile should have an acceptance check for nose projection, groove continuity, and correct orientation at the water-release location. The standard angle should have checks for corner alignment, nose height, cover, and reinforcement overlap. Both require sound mesh attachment and undamaged profiles, but their final functional inspection differs.
Put these criteria on drawings and inspection sheets, then mark the physical storage areas separately. Before embedding, hold the profile at the intended edge and confirm its section against the detail. A bead installed upside down or at the wrong face may look almost acceptable until the finish goes on. At that point, correcting a lost drip function can require removing the render around it.
Where a manufacturer offers several similar variants, ask for a code-to-drawing schedule and a retained sample for each. Do not use a single photograph to approve all lengths or shapes. At handover, record which profile was installed at each type of edge. Future repair teams can then replace a damaged section without turning a functional drip termination into a plain corner.
Conclusion
A drip bead controls the release point of surface water at a specified edge; a standard corner bead principally shapes and reinforces the angle. Both may have mesh, but their cross-sections and placement answer different design requirements. Specify the water path and wall system first, then confirm profile drawings and a finished mock-up. Jiangxi Ganfeng Fiberglass Mesh Co., Ltd. is a manufacturer and supplier of PVC bead products; select its exact profile by function and approved detail.
FAQ
Can a standard corner bead act as a drip edge?
Do not assume so. It needs a suitable exposed release geometry and approval in the specific detail.
Does every PVC drip corner bead with fiberglass mesh need a flashing?
Flashing requirements depend on the assembly and opening detail; a drip bead cannot replace flashing where it is specified.
Can both profiles use the same base coat?
Only when each exact profile and its mesh are compatible with and approved for that wall system.
How should a buyer distinguish them in a purchase order?
Use separate cross-section drawings, product identifiers, edge locations, nose projections, and approved installation details.

