Views: 0 Author: Site Editor Publish Time: 2026-10-30 Origin: Site


Hairline cracks, delamination, and water intrusion cost property owners thousands in structural remediation and interior damage repairs. These failures rarely stem from defective cement mixtures or poor-quality finish coats. Instead, they usually trace back to improper reinforcement placement during the initial build. Contractors and specifiers frequently struggle with exact embedment depths within the wall assembly. Should the reinforcement sit flat against the substrate, or closer to the outer surface of the lamina? Placing it incorrectly compromises the tensile strength of the entire facade and immediately voids manufacturer warranties.
Preventing wall failure requires a precise understanding of assembly mechanics and material behavior. You must know the exact operational differences between traditional hard-coat applications and synthetic insulated systems. Strict adherence to embedment protocols is mandatory to distribute environmental stress effectively. Selecting code-compliant, chemically treated materials ensures long-term durability against harsh weather and building settlement. This guide covers exactly where and how to install reinforcement layers to maximize structural integrity and eliminate surface cracking.
Stucco handles compressive stress exceptionally well. It acts much like solid rock under direct, inward pressure. However, cementitious materials fail rapidly under tensile stress. Wind loads, thermal expansion, building settlement, and severe freeze-thaw cycles physically pull the rigid material apart. This continuous pulling action creates microscopic fractures that eventually expand into visible surface cracks. When a building settles even a fraction of an inch, the exterior cladding absorbs that movement. If the cladding lacks the flexibility to stretch, it breaks.
The primary success criterion for any wall reinforcement is distributing this tensile stress evenly across a massive surface area. Proper placement prevents localized cracking and maintains the integrity of the weather-resistant barrier. Without adequate tensile support suspended within the lamina, the rigid cementitious layer simply snaps under environmental pressure. The grid acts as a shock absorber, taking the localized stress from a shifting window frame or a settling foundation and spreading it across the entire wall plane so no single point bears the full load.
Placing reinforcement too deep within the wall assembly guarantees structural failure. If workers push the grid flat against the underlying substrate or the insulation board, it provides absolutely zero surface reinforcement. The heavy cement mixture sits entirely on top of the grid, leaving the outer face completely unprotected from expansion forces. This specific error leads to immediate map cracking and structural telegraphing as the building settles. The wall might look fine when the scaffolding comes down, but after the first winter, spiderweb cracks will appear across the entire elevation.
Conversely, placing the reinforcement too shallow creates an entirely different set of severe problems. If the grid remains exposed through the base coat, it forms an incredibly weak bond with the final finish coat. Exposed fibers allow direct moisture penetration. Water wicks directly into the wall assembly, accelerating chemical degradation, freezing during winter months, and causing massive delamination of the facade. When water freezes behind the finish coat, it expands, physically blowing the acrylic or cementitious finish right off the wall in large chunks.
Standard cementitious applications require strict, methodical layering to achieve structural integrity. You must follow the "outer third" rule when installing fiberglass mesh for stucco. The goal is to position the tensile support exactly where the bending forces are most destructive—near the surface.
The grid should reside specifically in the outer third of the total base coat thickness. This precise positioning maximizes crack resistance at the extreme outer surface where tensile forces are the strongest.
Synthetic exterior systems demand completely different handling and preparation techniques. The installation requirements for EIFS fiberglass mesh focus heavily on substrate flatness and chemical adhesion. Because EIFS uses a relatively soft foam backing, the base coat and grid combination serves as the primary armor against impact and weather.
First, aggressively rasp the EPS (Expanded Polystyrene) insulation board. Rasping ensures a perfectly flat surface, removes any UV-degraded foam, and opens the cellular structure for better adhesion. Next, apply the synthetic adhesive base coat directly to the prepared foam. Immediately embed the reinforcement grid into the wet lamina. Trowel firmly from the center outward. The grid must sit fully submerged within the wet mixture. This specific process creates a continuous, impact-resistant weather barrier over the underlying insulation. If you skip the rasping step, the base coat will eventually peel away from the foam, taking the reinforcement with it.
Placement depth and material weight change drastically based on the specific environmental application. Interior veneer plaster utilizes significantly thinner coats and faces minimal environmental stress. Therefore, fiberglass mesh for wall plastering in these controlled interior spaces is generally much lighter. The grid sits very close to the drywall or blueboard substrate to prevent joint cracking. The primary goal indoors is achieving a smooth, paint-ready finish without visible seams.
Exterior applications face harsh weather, driving rain, and severe impact risks. They require thicker base coats and substantially heavier reinforcement grids. The exterior grid must sit deeper within the protective lamina to survive continuous freeze-thaw cycles and high wind loads without tearing or separating from the wall. You cannot use interior-grade materials on an exterior facade; they lack the tensile strength and chemical resistance required to survive outdoors.
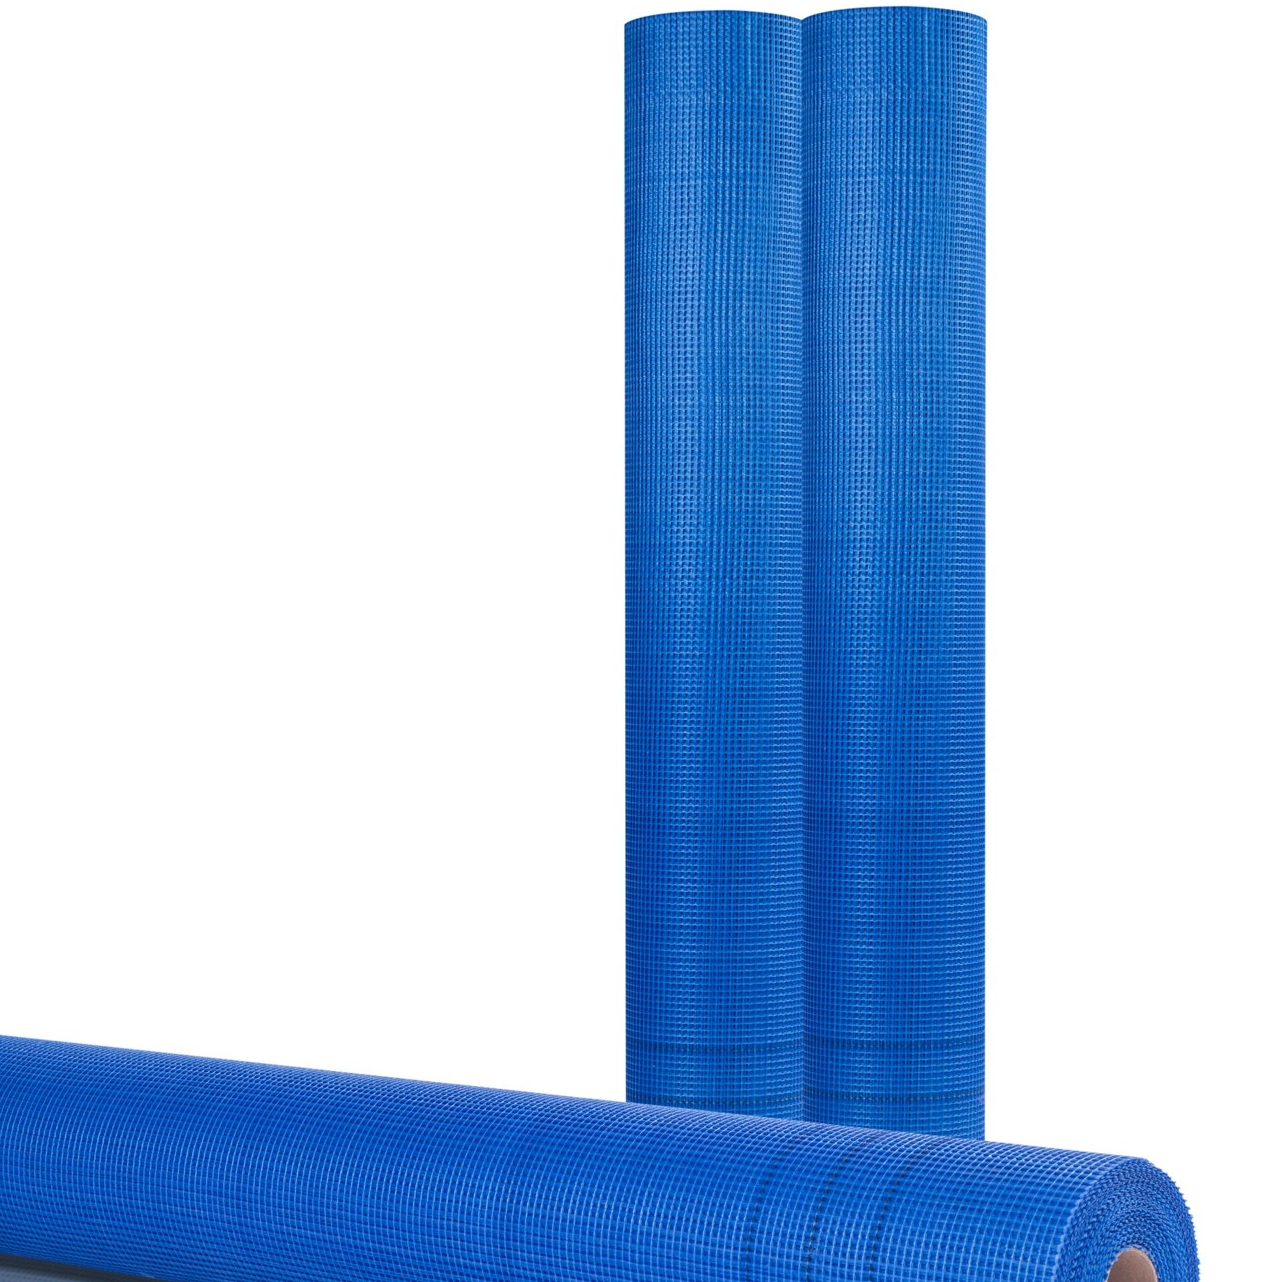
Raw, untreated fiberglass reacts violently when exposed to Portland cement. Wet cement creates a highly alkaline environment with a pH level often exceeding 12. This caustic chemical environment dissolves unprotected glass fibers rapidly. Within a few short months, standard fiberglass turns to mush inside the wall, destroying all tensile strength. The wall will look structurally sound from the outside, but the internal reinforcement will have completely disintegrated.
Specifying an alkali resistant mesh is a strict, non-negotiable compliance standard for any masonry project. Manufacturers coat these specialized grids with heavy liquid acrylic or styrene-butadiene. This protective chemical barrier shields the fragile glass yarns from alkaline attack. Always verify that your chosen materials pass rigorous ASTM E2098 testing for alkali resistance to ensure decades of structural longevity. If a supplier cannot provide the ASTM testing data, do not use their product on your job site.
Selecting the correct stucco mesh weight directly dictates the wall's survivability against blunt force trauma. Use a clear, standardized decision framework based on the specific location and anticipated risk factors. You do not need heavy armor on a third-story soffit, but you absolutely need it next to a busy sidewalk.
| Weight Classification | Ounce Range | Primary Application Areas | Impact Resistance Level |
|---|---|---|---|
| Standard Weight | 4.5 oz - 6.0 oz | Upper elevations, second stories, soffits, areas with zero pedestrian traffic. | Low to Moderate. Prevents thermal cracking but will not stop blunt force. |
| Intermediate Weight | 11.0 oz - 12.0 oz | First-floor residential, moderate traffic zones, patios, balconies. | High. Withstands accidental bumps from landscaping equipment and furniture. |
| High-Impact Weight | 15.0 oz - 20.0 oz | Commercial ground floors, alleyways, loading docks, schools, woodpecker zones. | Extreme. Requires a secondary layer of standard grid over the top for a smooth finish. |
High-traffic zones demand heavy-duty, ultra-thick reinforcement to prevent punctures. Upper elevations can safely scale down to standard weights to reduce overall material costs and ease the physical burden of installation. When using high-impact materials, you must embed them first, let the base coat dry, and then apply a second layer of standard-weight grid to achieve a finishable surface.
Contractors constantly weigh the operational benefits of modern synthetic grids against traditional metal lath systems. Using fiberglass plaster mesh offers superior onsite flexibility. It cuts easily with a standard utility knife, conforms to complex architectural shapes, and will never rust or corrode when exposed to moisture. It excels specifically at anti-crack surface reinforcement within thin-bed applications. You can carry a massive roll up a ladder with one hand, drastically reducing labor fatigue.
Traditional metal lath serves an entirely different structural purpose. Metal lath spans open framing studs and physically supports heavy, thick-bed cement applications. Metal provides the necessary structural rigidity to hold the weight of the wall, while glass fiber grids provide the critical surface tensile strength to prevent fracturing. In many high-end traditional hard-coat systems, contractors use both: metal lath attached to the framing to hold the scratch and brown coats, followed by a synthetic grid embedded in the final base coat to prevent surface cracking.
Outside corners represent the absolute highest risk areas on any building facade. They suffer constant impact damage from equipment, landscaping tools, and pedestrian traffic. They are also highly susceptible to structural cracking and subsequent water intrusion. Standard overlapping techniques rarely provide enough protection at these sharp angles. Wrapping a flat grid around a 90-degree corner often results in a rounded, sloppy edge that is difficult to finish cleanly.
We highly recommend integrating a PVC corner bead with mesh for maximum durability. This specialized component ensures seamless structural continuity. The rigid plastic profile absorbs severe blunt force impacts without denting. The attached fabric wings blend perfectly into the flat wall reinforcement grid. This integrated method completely eliminates cold joints at the vulnerable edges, sealing the corner against moisture and providing a perfectly plumb line for the trowel crews to follow.
Architectural openings create massive stress concentrations within wall assemblies. Normal building movement forces structural cracks to radiate outward directly from the sharp corners of windows, doors, and utility penetrations. If you look at a failing facade, the cracks almost always start at the corner of a window and travel diagonally down the wall.
You must install "butterflies" at every single 90-degree corner. These are 45-degree diagonal strips measuring a minimum of 9x12 inches. Embed these diagonal strips directly into the wet base coat before applying the main horizontal wall reinforcement. This simple, highly effective detailing step mitigates the vast majority of stress-concentration cracks around penetrations. The diagonal strip absorbs the specific diagonal forces that tear standard horizontal grids apart. Never skip this step to save time; it is the most common point of failure on exterior inspections.
Improperly executed seams instantly destroy the continuous tensile strength of the wall assembly. You must follow strict, unforgiving installation rules for all joints. All vertical and horizontal seams must overlap by an absolute minimum of 2.5 inches (64 mm). This overlap prevents cold joints, maintains load transfer, and eliminates structural weak points. If you butt the edges together instead of overlapping them, a crack will form exactly along that seam within the first year.
In EIFS applications, never align the fabric seams with the joints of the underlying EPS insulation boards. Always stagger the grid joints at least 8 inches away from the foam board seams. If you align the grid seam directly over the foam seam, any movement in the insulation boards will immediately telegraph through the base coat and crack the finish. Staggering the joints forces the tensile load to distribute across a solid piece of foam, protecting the vulnerable board edges.
A flawless, crack-free finish relies entirely on meticulous substrate preparation. The wall must be completely clean, dry, and free of dust, efflorescence, or form-release agents. For synthetic systems, properly rasp the entire EPS board surface before applying any wet materials to ensure a mechanical bond. If you leave dust on the wall, the base coat will stick to the dust instead of the substrate, leading to massive delamination.
Environmental controls are equally critical to the curing process. Maintain ambient and surface temperatures strictly between 40°F and 100°F during application and for 24 hours afterward. If the wall is too hot or exposed to direct, baking sunlight, the base coat will flash-cure. Flash-curing prevents the grid from embedding properly, leaving fibers exposed, dry, and structurally useless. In extreme heat, you must tent the scaffolding and use shade netting to protect the wet wall until it cures properly.
Proper embedment requires a highly specific operational workflow. The "wet-on-wet" technique is absolutely mandatory for success. Use a high-quality stainless steel trowel to apply the initial layer of cement. Sometimes, utilizing a notched trowel helps ensure perfectly uniform thickness across large, flat areas. The notches gauge the exact amount of material needed, preventing thick spots that take too long to dry and thin spots that expose the grid.
Immediately lay the grid into the wet cement. Trowel it flat, working from the center to the edges, without trapping air pockets or creating wrinkles. The most critical operational risk is allowing the first pass of cement to dry or "skin over." If the cement skins over before embedment, the grid will not bond chemically or mechanically. You will end up with a dry layer of grid sitting on top of hardened cement, causing catastrophic delamination of the lamina when the finish coat is applied.
Mistakes and environmental delays happen on active job sites. Sometimes the grid pattern telegraphs heavily through the base coat. If you can see the woven texture or touch raw fibers, the embedment depth is insufficient. Do not, under any circumstances, apply the final finish coat over exposed fibers. The finish coat is designed for aesthetics and UV protection, not structural bridging. It will not hide the texture of the grid.
Instead, wait until the first layer is firm to the touch but not fully cured. Apply a secondary, tight skim coat of the base material. Trowel this skim coat firmly to completely encapsulate the fibers, fill the weave, and create a smooth, monolithic surface ready for priming. This secondary skim coat adds minimal cost but saves the entire facade from failing aesthetic inspections and long-term water intrusion.
Site supervisors must physically verify placement accuracy before the finish coat goes on. Implement a strict, documented inspection framework to catch errors early. Do not rely on visual checks from the ground; get up on the scaffolding and measure the overlaps.
| Inspection Item | Pass Criteria | Fail Criteria | Remediation Action |
|---|---|---|---|
| Overlap Measurement | Minimum 2.5 inches on all seams. | Less than 2.5 inches or butt joints. | Apply a 4-inch strip of grid over the failed seam with fresh base coat. |
| Embedment Depth | Fully encapsulated, outer third of lamina. | Visible fibers, heavy telegraphing pattern. | Apply a secondary skim coat of base material to cover exposed fibers. |
| Corner Detailing | Diagonal butterflies installed at all openings. | Missing diagonal reinforcement. | Cut and embed 9x12 diagonal strips before proceeding. |
| Edge Protection | Integrated corner beads fully embedded. | Loose edges, exposed plastic profiles. | Re-trowel the edges with fresh base coat to ensure full coverage. |
| Staggered Joints | Grid seams offset from insulation seams by 8 inches. | Grid seams aligned directly over foam joints. | Apply a secondary layer of grid spanning 6 inches on either side of the joint. |
Verifying these specific elements guarantees the exterior system will perform exactly as engineered, withstand severe environmental stresses, and pass warranty inspections without costly callbacks. Document the inspection with photographs before the finish coat is applied to protect your firm from future liability claims.
A: Fiberglass mesh provides anti-crack surface reinforcement within the base coat or over continuous insulation. It does not replace metal lath for structural support. Metal lath is required over open framing or specific weather barriers to hold the heavy cement mixture, while the glass grid prevents surface fracturing.
A: Industry standards strictly dictate a minimum 2.5-inch (64 mm) overlap for all vertical and horizontal seams. This mandatory overlap maintains continuous tensile strength across the entire wall assembly and prevents structural cracking at the joints.
A: Portland cement creates a highly alkaline environment with a very high pH level. This caustic environment will quickly dissolve unprotected glass fibers over time. Alkali-resistant coatings protect the yarns, preventing total reinforcement failure and severe wall cracking.
A: While both are alkali-resistant, EIFS variants are specifically tested and certified as part of proprietary, multi-layered synthetic exterior systems. They often require specific weights for impact resistance and strict compliance with building codes tailored to insulated facades.
A: Yes. They are highly recommended for exterior applications. Unlike galvanized metal, PVC will never rust or corrode when exposed to heavy moisture. The integrated fabric wings ensure a seamless, crack-free bond with the wall's base coat.
A: No. You should never mechanically fasten or staple the grid to the wall. It must be embedded directly into the wet base coat using a trowel. This ensures it acts monolithically with the lamina and avoids creating puncture points for moisture intrusion.
A: Visible fibers or a heavy telegraphing pattern indicate insufficient base coat thickness. You must apply a second skim coat of base material to fully encapsulate the grid before adding the finish coat. Exposed fibers compromise the weather barrier and weaken the final bond.